Friday, May 31, 2013

Baby Blanket Cakes

Baby blanket cakes are a super cute design for showers, with the added benefit of being super straightforward to cut.  To make a baby blanket design on a cake, you just need something like a long metal ruler, a large spatula, or something metal with a thin edge that you can use to make straight lines across a cake. 

Judging by how big your cake is, you can decide if you want 1x1 inch squares or larger. 

Then, you will base ice the cake, getting the sides smooth but not having to be too overly concerned with the top.

Go ahead and put your piping on the edges, and use a smaller piping for the lines to make the outline of the squares.  This particular cake fills them in solid colors with piped stars, but you could also make little patterns either in the individual squares or make the squares a larger pattern like a chevron print.  To do a chevron pattern I would suggest using 2 to 3 rows of stars (depending on your square size) running from corner to corner within the square so that each square makes one side of the chevron. 

We like to put little yellow chocolate duckies on our baby shower cakes, as they are incredibly cute and highly appropriate.  Also to be considered would be flowers, monkeys, cowboy boots, etc.  With melting chocolate in an ever-increasing range of colors, it is not difficult to find something that will work with your theme.  Finish it off with some edible glitter or sugar flakes to give it a little pizzazz and enjoy!

Happy crafting! Pin It Now!

Thursday, May 30, 2013

Lingerie Cookies

We got an order to do lingerie cookies for a bachelorette party.  The girls wanting them have big fun personalities, so it was a perfect combo for the first round of these we have done.  We decided to do a mix of some that were more on the sexy side, and some that were more on the fun side.

Because let's face it, we all prefer fun-derwear deep down!

To do this, you just need your favorite sugar cookie dough recipe, a heart shaped cutter, royal icing and icing bottles, sprinkles, and desired colors.  Using a heart shaped cutter, make the tops full hearts and the bottoms hearts with the tip cut off. And make even numbers for sets!

We also did shoes for this order, and a lot ended up coordinating with our sets.  Do the outline first of one of the cookies.  If you want to give it a sparkly trim, now is the time to add edible glitter.  We used various colors of edible glitter sprinkles for trim, used round thin sprinkles to make polka dots, and so on.  Shaped sprinkles such as flowers would give you cute sets with very little hassle.

Anyway do the outline and let it sit for a few minutes, meanwhile working on other outlines.  When you go back to fill in, you will want to add in sprinkles for polka dot ones.  To get things like a zebra look, put down your base color and pull a few black thin lines through it while it is wet.  Use a toothpick and drag through the icing to make chevron looks or zebra.

I also put pink on the bottom half of a cookie, white on the top, and swirled a toothpick through to make it have an interesting varied color.  To get a really fine eyelet lace type look, use a toothpick to pull small circles with the outline icing right after you apply it.  You can always add more icing if you need.  For cheetah print, I put a dot in icing that was just starting to set and used black to make a very thin rim around the dot.


Happy crafting!


Pin It Now!

Wednesday, May 29, 2013

Fruit Salsa: Mango, kiwi, pineapple PERFECTION

Ingredients:
-1 Mango, peeled and cubed small
-2 Kiwi, peeled and cubed small
-About 1 C of chopped fresh pineapple
-About 1/2 C pineapple juice (basically I bought a fresh cut pack from the grocery, used the juice and almost all of the pineapple in it)
-2 mint leaves, very finely chopped
-1 TB honey
-1/4 tsp ginger

Super simple, all you need to do is mix it all around.  You can eat it the first day and it is pretty good...but you can let it sit overnight and it is AMAZING.

A lot of people might balk at the mint, but it is super refreshing and not overpowering when used in moderation.

And when I say honey, I mean high quality AWESOME honey that is locally sourced.  A big THANK YOU to Whole Foods for having locally sourced honey.

Anyways, I ate it with the scoops from yesterday and the cinnamon sugar combo on them with the tangy sweet fruit in this is sweet perfection.  THIS is going to be on my summer menu permanently.

You could use this on chicken, as a dressing on kabobs, on fish, you could top froyo with it, pizzazz up some plain Greek yogurt, or eat it as a relish-type thing on an English muffin (an excellent suggestion from my mom). 

Happy crafting! Pin It Now!

Tuesday, May 28, 2013

Homemade Tortilla Scoop Chips: Honey Wheat

Ingredients:
-3/4 C whole wheat flour
-1/2 TB honey
-1.5 TB butter (softened)
-Pinch of salt
-Pinch of baking soda
-1/4 to 1/2 C lukewarm water

Mix/knead ingredients well to form a ball.  Add the water slowly until it just comes together.  You may end up needing to add more flour, but you want a dough ball that is no longer sticky but feels moist.

Roll small dough balls about marble sized.  On a floured surface, roll the small dough balls out very thin.  Grease the back of a mini muffin tin and sit it between the wells to form a bowl.

Bake for ten minutes at 350, flip them over between the wells as best as possible and bake another 8-10 minutes. Continue to bake as needed until desired crispyness is reached.  

On a dark nonstick, the 20 minutes was just about right for me.  The lighter pans may take a little longer.  I also baked some draped over the cupcake wells.  While that was possible and did work, it did not seem to work as well or bake as quickly as this method, which I surmise is from the scoops being encased by metal in the first style and not so much in the second.  Or it could be because my first was dark nonstick and my second wasn't.  It is also very likely that you could bake them inside the actual wells and that might work just fine since the dough won't rise or spread out...

That one just did not occur to me.  But for scoops shaped like the mass produced ones, opt for the backside of the pan.

I sprinkled mine with cinnamon sugar after they came out.

Now, why did I make honey wheat tortillas with a cinnamon sugar sprinkle?  I have a delicious fruit salsa in the mix and needed some dipping goods.

Tune in tomorrow for a tasty fruit salsa recipe!

Happy crafting! Pin It Now!

Monday, May 27, 2013

Braided Ponytail

So my sister and I were discussing various Pinterest braids we had seen and I determined later that I would mess around with my hair and see what I could make my hair do.

All I can say, is I kind of wish I had ever known how to do stuff like this during volleyball season back in the day.  Keeping the mane in line was always quite the task.

To do this, I put my hair in a high ponytail.  Next, I grabbed a small section of hair from the top of my ponytail and separated it into three sections.  I crossed it in a braid for multiple crosses before I started pulling hair into it.

Next, whenever I crossed from the top down, I would pull a very small addition of hair into it.  When I crossed from the bottom side up, I did not pull hair with it. 

I did this until I got to the side, and then braided regularly (without pulling hair) until I had enough to get around my ponytail.  This just made it simpler for me than trying to figure out where to pull behind my head and underneath my ponytail holder. You could make this as tight or loose around as desired.

As always, I highly suggest learning to braid without mirrors.  For me it is a lot simpler to just think about the movements than it is to attempt to think about what direction I need to move in a mirror.

I started again pulling hair for the part that wrapped around the front.  I secured the entire braid and ponytail at the end of the ponytail holder.  You could also use a clear ponytail holder.  Other options would include braiding the last section by pulling hair from both sides to get the entire bottom into a braid.

This is a different way to change up a ponytail with a lot of variations. Like I said, this would have been FANTASTIC back when I played volleyball, and could make a reasonable beach hair as well.

Happy crafting! Pin It Now!

Sunday, May 26, 2013

Banana Cake Pops with Honey Cinnamon Buttercream: Pokeball Cake Pops!

Ingredients:
-1 very large, very VERY ripe banana
-3/4 C Swan's Down Cake Flour
-3/4 tsp baking powder
-1/4 tsp baking soda
-1/2 tsp cinnamon
-1/4 tsp ginger
-Pinch of salt
-1/3 C milk
-1/2 tsp white vinegar
-1/3 C granulated sugar
-2 TB packed brown sugar
-2 TB vegetable oil
-1 tsp almond extract
-White chocolate, red chocolate, regular chocolate, white round sprinkles
Filling:
-1/2 stick butter
-1/4 C high quality honey (go for locally sourced!)
-1 C powdered sugar (more or less to achieve desired texture)
-1/4 tsp cinnamon (more to taste)

Mix the milk and vinegar together and let it sit while you mix up other ingredients.  Put the extremely ripe banana in your mixer bowl with both sugars, cinnamon, ginger, and oil. 

Next, add the flour, baking soda, baking powder, salt, almond, and milk mixture.  Mix on a medium speed until well combined.

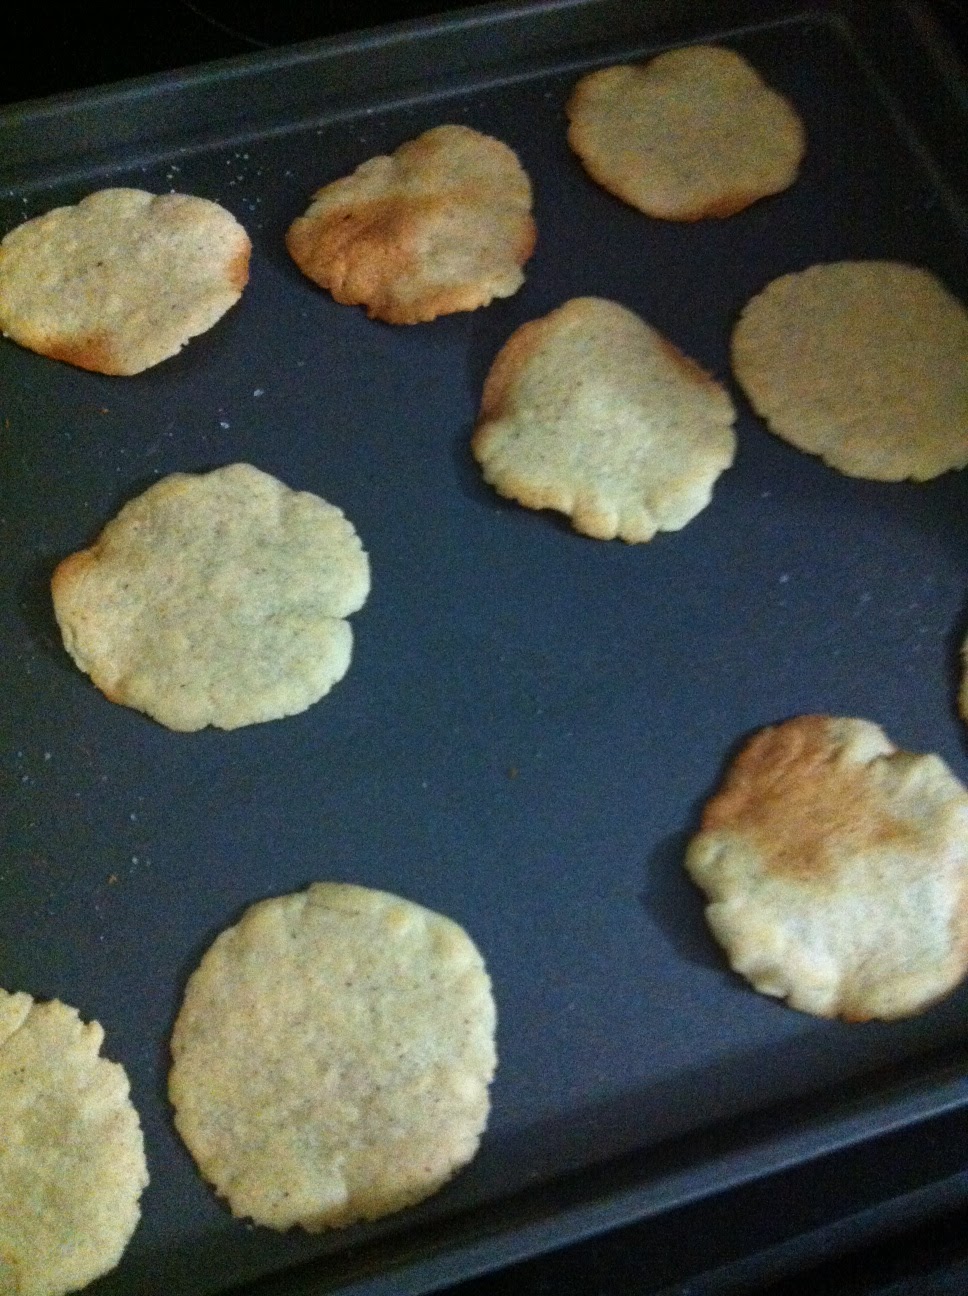
Heat up your cake pop maker and spray with cooking spray.  Fill each well with about a tablespoon or so of batter (needs to fill up the bottom side of the well).  I like to use the smaller cookie scoop/melon baller to fill the wells quickly.

Bake about 5 minutes.  Sit on a wire rack to cool. 

For easy filling, I like to cut mine in half, stick the stick through the bottom half.  Then I pipe in some icing or filling.  For the filling, you want it to be stiff enough to not run over the sides but soft enough to add moisture to the cake.  I mixed mine with a spoon, there was nothing to it.  Stick the top half on, sit it on a plate, and freeze the pops for about 20 minutes or so.

Melt the white chocolate and dip the cake pops.  Shake off the excess and put them in foam or a stand to dry.  Do the white on all the pops first.

Next, melt red chocolate, adding in a tablespoon or so of oil once it is melted if you need it to be more smooth.  Dip the top half of the cake pops in and return them to a stand.  After all of those are dipped, use a knife or a piping bag to string chocolate around the pop, making a round spot in the front for the sprinkle.  Put the sprinkle on and return the cake pop back to the stand to dry completely.

I played Pokémon a LOT as a kid.  When I got my wisdom teeth out (2 cut out, 4 other teeth pulled, braces put on 3 days later) I logged about 40 hours on a Pokémon game in one week.  I didn't even need pain meds, haha, I was far too distracted.  But a distracted champion.

Anyway, ever since I got the cake pop maker I knew I would eventually make me some cake pops like this.  I thought about making a lot of game themed things (Tetris, PacMan, Mario, etc) but I ended up just sticking with these. 

No worries, I graduate with a Master's next summer, there will always be more parties that need a theme ;).

These were super delicious and tasted just like amazing banana bread.  They will certainly be in my bake sale rotation the next time one is coming up.

Happy crafting! Pin It Now!

Saturday, May 25, 2013

Sports Cupcake Arrangements: IU Cupcakes

This particular arrangement used 45 cupcakes.

Basically the best way to do this (in my opinion) is to make two different kinds of cupcakes.  This way, you can lay out the cupcakes before you ice them and get an idea of how they will look.

We did white with white icing and red velvet with red cream cheese icing.  

This is super simple and a great way to have a fun themed party dessert that people can mill around and eat without needing plates and silverware.

Happy crafting! Pin It Now!

Friday, May 24, 2013

Dressed Up Side Braid

Twists and braids are my long hair best friend in the mornings when I really don't want to spend more than five minutes on my mane. 

If you are just tuning in to the saga of my life, I don't own curling irons or flat irons and I use a blowdryer maybe once a month.  My hair fixing tools consist of ponytail holders, bobby pins, hairspray (lots of Freeze It), sponge rollers, and a teasing comb.

To do this, grab a section of hair at the top front of your head.  Twist it back toward your scalp a few times, and then start pulling in sections from the front and incorporating them in as you twist back.  It is a lot like braiding, but way simpler.  Continue to do this around and down on your head until you get right at your ear. 
 The section that you twist will be 1 of the three segments for your braid.  You have a couple of choices, you can either twist far enough down that you can just do a regular braid, or you can start a French braid where your twist ends.  For me, I did a French using the twisted segment, a section from the side/back, and a section from the back. 

Cross them over like you do a regular braid, but pull in small sections of hair to incorporate with the section you crossed (for anyone who may not have French braided before, or not braided their own head).

So if I am crossing over the twisted piece first, I like to cross it, hold it in my other hand (usually I have different pieces held between different fingers) and then would pull in a small section from the side it came from and incorporate it with the twisted segment that is now on the other side.  I would continue this from both sides until all my hair was secured.

You can either leave it twisted somewhat tight, or you can pull the twist a bit so that it creates a more poofy and soft look. 

If you have a long thick mane like this, you can potentially do twists on both sides that meet in a braid.  Just be a aware that one side may not be as thick as the other if you part your hair off center like I do.

You could stick a little cute flower or barrette or whatever where the braid starts if you like, which would make it a little more fancied up for special occasions.

Even though my workplace is not a fancy one, I still like to have a decent looking do.  But I REFUSE to spend more than 15 minutes on my hair, and 15 is really pushing it for me.  So any style that comes together quickly is right up my alley.

You can also twist your hair and then secure it in a bun.  To make life simple on myself when I do that, I put bobby pins in my twist just long enough to get the right looking bun in.  Once the bun is in feel free to remove the pins. 

You can also twist up higher and go into a ponytail, you can really do whatever you want with it.

Happy crafting! Pin It Now!

Thursday, May 23, 2013

Flourless Chocochunk Peanut Butter Cookies

Ingredients (single batch of about 16)
-1 C sugar
-1 egg
-1 tsp vanilla
-1 C peanut butter
-1/4 C chopped chocolate candiquik

Preheat your oven to 350.  Mix all the ingredients together, with the chocolate chunks going in last for easier mixing.  Using a cookie scoop, put even dollops on a greased cookie sheet and use the back of the scoop to smoosh the dollop down.

Bake for approximately 15 minutes.  For the record, this picture makes them look REALLY flat but mine are at least about 1/4 inch thick.  So ignore the oddball angle.  You basically just want them to get a slight golden tinge at the edges.

Start checking your oven at about 12 minutes, but be prepared to bake them for up to 18 minutes on light baking sheets.  The type of oven and light versus dark sheets makes a WORLD of difference. 

I have proof of this.  For 295 days of my craft challenge, I had REALLY good cooking luck.  I definitely had crafts that failed, but for the most part I did not murder any food...until today. :)

So PLEASE if you have a convection oven, check these cookies at about 8 minutes if you use that feature, because 14 was straight up MURDER tonight.  I guess we can't all be perfect all the time...

Happy crafting :)! Pin It Now!

Wednesday, May 22, 2013

Peacock Earrings

I have really sensitive ears. I cannot wear big heavy earrings because they hurt the second I put them in.  So, in response to this, I really like feather earrings because they can be ginormous without killing my lobes.

I brought home my bead box only to remember that I took all my findings out of it and put them elsewhere....great.  So I had all sorts of cool beads and NO earring closures.  No matter, I always have spare already made jewelry around.  Go-go gadget McGuyver Crafter.

I took apart some bottle cap earrings to get the hooks.  Next, I unwrapped some wire earrings that I made a long time ago that I hated and used the hot pink wire to wrap the base of the feathers and make a loop.  Wrap them a few turns, make the loop in the middle of the wire and wrap the rest of the wire around it to both secure the feathers and secure the loop.

Next, I added a little E-6000 to the wire to finish the hold.  Then I put the hook and jump ring onto the wire loop and in just a few minutes they were ready to go.

I found these peacock feathers at a flea market of all places, but Hobby Lobby and Michael's and Amazon are other options if you just need a few. 

Happy crafting! Pin It Now!

Tuesday, May 21, 2013

Banana Grahams: Tasty banana flavored graham crackers without butter!

Ingredients:
-1 Very ripe banana (on the larger side not a shrimpy one)
-2 tsp vanilla
-1/2 C Milk
-1/4 C honey
-1 C brown sugar
-2 C AP flour
-1 C whole wheat flour (plus more for dusting and kneading in)
-1 tsp baking soda
-1/2 TB cinnamon

Break up the banana and add the milk, honey, and vanilla and mix well in your mixing bowl.  Add in the brown sugar.  Once that is all mixed, add the remaining ingredients.

The dough will be very moist, dependent somewhat on how big of a banana you used.  Turn it out onto a WELL floured surface.  Use more wheat flour for the surface.  Start dusting and kneading in flour until it becomes not sticky and you are able to roll it out.  Just warning you, it will be a complete sticky nightmare for the first few minutes.  Total pain.  You might consider kneading it in your bowl with extra flour with the dough hook. 

I would suggest if your room is warm due to your oven being preheated to 350 degrees to put some of the dough in the fridge and work in thirds or so.  Roll the dough out to desired thickness.  I happen to like thicker soft cookies of this as opposed to super thin crackers. 

Bake at 350 for 6-10 minutes, until you cannot squish them down with a light touch and they are starting to brown just a bit.  I made teeny tiny little stars for my first batch, and super cool dinosaurs for my second batch.

...No they are not for a child, I happen to like T-Rex too.  Don't judge me, Jurassic Park is my all time favorite movie.

Anyway I let mine cool on a rack and dusted them with cinnamon sugar right when they came out of the oven.  I will transfer them to a bag or cake plate to store them.

So, they are not perfectly healthy, but there are substantially better for you ingredients in these as compared to other cookies.  And they are TASTY.  If you like bananas, banana bread, and similar you will really like these.  They are sweet and flavorful and super addicting.  They would make a great snack for kids in these little star shapes.  You can usually find sets of various sizes at places like Michaels, Hobby Lobby, cake specialty stores, and similar that have everything from teeny tinies to extra hefty cutters.

Happy crafting! Pin It Now!

Monday, May 20, 2013

Softball Cookies

All you need for this is red and yellow royal icing.  If you are doing baseballs, you want white and red but softballs tend to be yellow with red stitching.  Of course, if you have a themed party to a certain color you can always do that as well.

I suggest doing the stitches first and letting them set up a few minutes.  If they run or blur or anything goes wrong it will allow you to correct it on the fly with the yellow color.  If you do the yellow first, you can try to thread the red in while it is wet but it will be extremely difficult to get it just like you want it.  Plus, when you think about it, stitching pulls in fabric regardless, so the slight texture of the first one drying a little is actually kind of appropriate.

If you do the yellow first and let it set up, you then run the risk of goofing your red and not having a way to go back over it.  If it trails out more than you want, or bleeds, or forms a blob, it will be really difficult to correct.  That is why I suggest red first.

Happy crafting! Pin It Now!

Sunday, May 19, 2013

Corn Chips from Scratch

 Remember the tortillas from yesterday? This uses the same dough:
-1 C masa harina (corn flour, find it on the international row under that or similar names)
-Up to 1/2 C warm water (add slowly, just enough for the dough to come together to make a moist but not sticky dough)
-1/2 tsp salt

You want to mix the dough all up and knead for a few minutes (about five or so).

Roll into small balls about the size of a grape tomato.
Flatten the dough between two sheets of plastic wrap, using a plate, your hand, a tortilla press, cake pan, etc.

Lay out the disks on a greased cookie sheet and sprinkle with additional sea salt.  You can also consider other things like a little taco seasoning or some other flavor as desired.

Preheat your oven to 400 degrees.  Bake the chips for 7-8 minutes, flip, and bake another 4-5 minutes until they are starting to brown and reach your desired crispness.

It is better to get them all a uniform thickness, so that they will bake evenly.

These are FANTASTIC! I ended up sprinkling a little extra salt on them when they came out and I tasted them, so be prepared to adjust as needed.
Serve them with a tasty dip or as nachos and enjoy knowing that you know every SINGLE thing that went in to these tasty little chips.

Happy crafting! Pin It Now!

Saturday, May 18, 2013

Homemade Corn Tortillas

Ingredients:
-1 Cup Masa Harina (corn flour, find it at your local grocery store on the international foods row)
-1.5 tsp salt
-At or less than 1/2 C of warm water

Plop the flour and salt in a bowl.  SLOWLY add just enough water until the dough comes together. Knead it for a few minutes and add in a little more corn flour if needed.  It should be moist but not sticky.

If you buy the flour from WalMart and the bag is white and orange do NOT follow the directions on the pack.  They are completely wrong.  I mean like so wrong you end up using half your bag of flour just to get it back to the right consistency.

Anyway, divide the dough into about 6-7 little balls, or fewer larger ones depending on what size you want your end product to be.  You may be able to tell from this picture that I made some of pretty much every size...well hey we can't all be perfect.

Put the dough ball between two sheets of PLASTIC WRAP.  No subs.  Definitely NOT wax paper that you already had out and figured it would work just as well...IT DOESN'T.

You have many options for flattening them.  A rolling pin is not one of them.  Flatten them between the plastic wrap using a plate, a cookie sheet, a cake pan, a cutting board, whatever you have handy that you can apply sufficient pressure to smash them thin. Very gently remove the plastic wrap.  You could buy a tortilla press.  I would really like to have one of those after these.

Get a skillet heated on medium high and cook the tortillas on each side until brown.  It should take about 20 to 30 seconds depending on your stove, skillet, etc. all of those other differences between cooktops and whatnots.  You can use a griddle too if you like.

Top them with your favorite taco toppings and MARVEL at how fantastically delicious they are in every way imaginable.  Quite frankly, this summer may consist of some more flour tortillas, but they will not be happening in my grad apartment when I get back.  I LOVE the taste of these corn ones so much better.  And the texture is much more to my liking.

Flavored wheat wraps may definitely still happen, however. 

Happy crafting!

Pin It Now!

Friday, May 17, 2013

Decorating Idea: Martini Themed Cookies


Well, I don't know why this particular picture will not ROTATE since it shows it the right direction on my computer.  However, I think you can get the idea.

To do these cookies, I did the white outline first and put white sparkly sugar on the top rim.  I did that on all the cookies and let it dry before I moved on to filling them in.

Using the white again, I filled in the center of the glass.  I mixed up a little vodka and some green luster dust in a mountain dew cap (the perfect size for this kind of thing) and painted the royal icing while it was still wet. You can basically just dab it in and around and make a fantastic varied color. 

Next, while the green glass part was still wet I gently put a black line through it, stopping at the rim and with a little piece above the rim to represent the stick for the olives.

Using 3 small green edible pearls I made the olives to complete the martini.  You could very much do this with any color you like and use pink pearls or red ones to represent a cherry or similar.

Happy crafting! Pin It Now!

Thursday, May 16, 2013

Star Cookies: Decorating Styles

SO this is a decorating idea post, because these stars had so many different coatings so to speak.

For some of the cookies, we poured white royal icing into icing bottles and then put a little icing on a knife (if the paste kind) or squirt some in and stir it with a knife.  If you under-stir it the end result will be a pretty marbled effect.

On the white and pink ones we used solid colors and put edible sugar flakes.

For the yellow ones, we did some solid yellow and put colored sugar sprinkles on top.  On others, we did the blue outline first and came back and filled them in with yellow and added the sprinkles.

I REALLY like the two tone ones the best.  We did these for kids as they are less messy than cupcakes but will still provide ample sugar rushes just in time for them to go home with their mommies....

Bwahahahaha.

Just kidding.

Anyway cookies are great for parties because no one throws their wrappers anywhere and they are very mobile. 

Happy crafting! Pin It Now!

Wednesday, May 15, 2013

Sixlets: Delicious Decorations

As always, I love a tasty decoration over something like gumpaste any day.  Gumpaste has its place in fancy flowers and questionable weather, but for anything else something a little more tasty may be in line.

At Hobby Lobby in the Wedding Section, there are many bags of colors of sixlets.  They come in all white, red, pink, blue, green, brown, purple, etc.  They are about the size of a pea or maybe just a tad bigger.

By putting an almost drop flower type glob of icing on a brownie and putting a sixlet center in it, you can really make a pan of brownies stand out with hardly any time invested at all.

Sixlets like these are also a great option for using in piping around a cake to add color or just add a little shine.

They of course will also make cute additions in favors and are a great way to stretch out something more expensive like personalized M&M's.  Always check Hobby Lobby's site for the 40% off coupon.  The sixlets really go a long way and the bags are good sized.

Happy crafting! Pin It Now!

Tuesday, May 14, 2013

Cucumber Dill Dip

I love hummus, and tzatziki, and making somewhat similar things with the ingredients I have.

For this dip, I mixed up 1 C of Plain Chobani Greek Yogurt, 1/3 C Sour Cream, about 3 TB fresh dill, the zest of one lemon, a half tsp of garlic, a finely shredded cucumber, and a pinch of salt.

If I had my jar of Beau Monde, I would completely have put a TB or so of that in as well.  It goes great with dill.

The dip came out really light and fresh.  I am thinking that it will go great in a layered dip with hummus.  It will hopefully go first layer hummus, second this dip, topped with asiago or parmesan (feta would be a fun choice if you had it on hand), shredded spinach leaves, and diced tomato. 

If you are an olive lover, you could easily toss a few of those on top.

To eat with this I used the rest of my wraps and made them into tortilla shells.  I cut them into 8ths and put them on a baking sheet.  I sprayed them with cooking spray and sprinkled salt, garlic cheese topper, and a tiny bit of pepper on top.  I baked them at 350 for 6 minutes, flipped them, and baked for 6 minutes more.

This makes a great light and fresh dip for the summer!

Happy crafting! Pin It Now!

Monday, May 13, 2013

Color Collection: Room Rehab

We are in the midst of fixing up an old house.  Roughly 200 years type of old.  It has a lot of great details all over it.  Since I was gone all year for college, I held off on deciding on the paint color I really wanted until now. 

The inner part of the mantle was already an interesting color of green and a little worn looking. I absolutely loved it.  I knew I wanted to keep it that way, and would need colors to coordinate with it.

For the entire room, my theme is natural colors with mixed metals.  Metals are naturally occurring minerals and similar, so to me and my ex-geology self it all makes sense.

As a random sidenote, I went to DC right after my undergrad was finished and one of the places we visited was Mt Vernon.  What I noticed in Mount Vernon was all of the beautiful colors inside the house that were bold and fantastic with white trim.  I am going to do two tone walls throughout most of the room, but my mantle was going to be a statement wall of all one color.

For my mantle, it is painted with Martha Stewart's Precious Metals paint in "Bone".  It looks like a pearly white and adds a nice faint shimmer to the mantle.  I want the central part of my room to be the focus with a stunning huge light, a pretty mirror above the mantle, my rehabbed table from a few days ago, and little unique metal knick knacks and details.

For the green shown here, I used Behr paint+primer in Oregano Spice.  I absolutely 100% recommend using Behr.  It is thicker and in most cases you will only need one coat unless you are painting something obnoxious like old enamel paint.  Because it is thicker, it splatters less, which also makes me really really happy.  I love the colors and quality of Behr, however, and have yet to be unhappy with my choices.

The third color that I will be pulling in, not shown here, is a light tan in Behr called Mushroom Bisque.  I think it will work really well with the bold green color.

I absolutely adore green and white together.  As the room comes together over the next few days, more pictures will follow.  But in conclusion, buy Behr! Paint and Primer, Satin Finish.  Always satin finish.  I love the soft cozy glow of satin paint.

Happy crafting! Pin It Now!

Sunday, May 12, 2013

Homemade Wheat Wraps

Ingredients:
-1.5 C whole wheat flour
-2.5 TB butter; softened
-1 tsp baking soda
-3/4 C lukewarm water
-Pinch of salt

Mix all the ingredients in your kitchenaid with the dough hook attachment until it forms a ball.  You will want to add the water slowly and add just enough to get it to form the ball. 

Sprinkle a little flour on a surface and divide the dough into 6 equal balls.  They will be about 2 inches in diameter or so.  Cover the dough balls with a dish towel and let rest for ten minutes.

Get a skillet cranking on a high heat (I started mine at about 7.5 and ended up bringing it back down halfway through to 6.5).  One ball at a time, roll the dough out on a floured surface extremely thin.  Take the rolled out shell to the skillet and cook it about 10-20 seconds on each side until it starts to blister.

Here is my main reason I like to make wraps and stuff homemade...

I don't understand why wraps are round.

When I make stuff like my Italian wrappetizers where I fill them with yummy things and then cut them into slices, I have to toss the end pieces from where it is not even.  If a wrap was more rectangular, I could utilize the whole thing and not have any waste.

So since I can now make my own, I make them the shape I want.  I think it will also be beneficial in the land of regular wraps because stuff can go closer to the ends.

Let's be realistic, how many of you tear off the end of a taco because you don't like all the excess shell? 

Anyway, back to the wraps.  You want to repeat that process with the remaining five dough balls.  Store them in a Ziploc bag in the fridge for up to one week.  If they are not very pliable at some point, just warm them up for a few seconds in the microwave.

If you know for sure you want Italian things, feel free to toss in some herbs or seasonings like basil, rosemary, etc and get another level of flavor.

Happy crafting! Pin It Now!

Saturday, May 11, 2013

Red Velvet Cheesecake Bars

Ingredients:
BASE
-1 box red velvet cake mix
-1 egg
-1 stick melted butter
-1/2 tsp almond extract
TOPPING
-1 box powdered sugar (1 lb)
-2 eggs
-1 package cream cheese

Mix the base ingredients together and press into a 9x13 inch pan.  Mix the topping ingredients together and pour over the base.  Bake at 350 for about 45 minutes.

You will want to let the bars cool a bit before cutting them, about 1 hour.

You don't have to cut them in to very big squares because they are very rich and decadent. 

These are such a tasty and quick one pan dessert to take to a pitch in or make for a party. 

Happy crafting! Pin It Now!

Friday, May 10, 2013

Cheap Table Rehabbing

 Materials You Will Need:
-A Table (of course)
-2 to 4 fancy shelf brackets (I bought mine at Meijer for $4 each)
-Liquid Nails
-Looking glass spray paint
-Hammered brown spray paint

I forgot to take a picture of the table beforehand, but it was a small round wood looking table (aka laminate type stuff) with a heavy base, as it was used in a restaurant.  Think table for one.

Anyway I wanted it to have some pizzazz, so I got the hair-brained scheme to see if shelf brackets would work.  They worked fantastically.  You can find some pretty ornate ones at places like Hobby Lobby.  I only got two from Meijer because it is going to be in the center of my room under a large light, and the two will face the door.  The other two would not have been as noticeable so I just chose to not worry about them.  If you are concerned with 360 degree visuals, invest in 4.

Attach the brackets with liquid nails. Putting them on the bottom was super simple because they could just rest there while they dried.  Flip your table upside down and attach them if you want to put them under the table top.

I freehand sprayed the looking glass mirror paint on the top and gave it about 5 minutes to dry.  Seriously shake that can well.

Next, I freehanded the hammered bronze around to give it a look like it faded into the mirror paint.  The easiest way to do this is just to walk around the table keeping your arm steady. A few little flaws won't be a problem at all, again it really helps the faded look.

Then I just finished up the bottom and the shelf brackets and let it all dry.

Might I suggest a well ventilated area.  The looking glass paint is especially nail-polish-y.

Possibly because the table was old and probably not really sealed, or maybe because I pretty much didn't wipe off, it ended up with a really cool faded and old look on the mirror paint.  I absolutely love it.  I may put a second coat on it tomorrow, but I am really considering just leaving it.  I love the clouded mirror look that it ended up with, and the way that the hammer paint looks a little bubbled made the fade effect I had hoped for.

This table will correct my vast oversight in buying a light that is astonishingly gorgeous but perhaps just a little long to hang from my ceiling without injuring people.

No matter, I will put a table under it, a cute and darling chair next to that, and it will face my fire and make me look like some reflective writer type or something like that.

You know, if you have a really good imagination of course.

Anyway, all in all it cost me less than 20 bucks in paint and brackets to make my table something completely unique.

If your room is not done in a lot of browns like mine will be, consider using the dark gray hammered paint.  I think that would be BEAUTIFUL on this type of a project.

Happy crafting!

Pin It Now!

Thursday, May 9, 2013

Tuna Salad

Ingredients:
-2 cans of tuna in springwater
-5 boiled eggs, chopped
-1/3 C mayo (for lighter versions feel free to use a fat free or mix full fat with greek yogurt)
-2 TB finely chopped dill pickles
-Pinch of salt
-Multigrain country bread from Trader Joes

Boil and peel the eggs, super fresh eggs are a PAIN to peel so just be forewarned that if you have just picked up a carton from TJ it is probably going to be a real nightmare when you start peeling them.  Better would be using ones that have maybe been in the fridge the whole week or even that may be leftover from last week. 

Once you get them peeled and chopped you just want to mix up everything and put it on some nice toasty multigrain bread.  It works SO well with a bread that has a little texture like that.

This stuff is also completely fantastic on Ritz crackers and mini slider buns.  Triscuts are also perfectly acceptable, I would HIGHLY suggest the dill flavored ones. 

Happy crafting! Pin It Now!

Wednesday, May 8, 2013

Pendant Rehab

All you need is a pendant you took off an old necklace and a can of "Looking Glass" Spray paint by Krylon.

I wanted to redo this one because, well, I never wear purple.  Ok fine I do a little, I love purple, but I don't wear purple jewelry.

I would however like a pendant that was cool and metallic and matched with everything.  That is way more useful.

Please, by all means, do this in a well ventilated space.  Looking glass paints smells a LOT like nail polish.  It is pretty toxic.

Shake, shake, shake that can well.  SHAKE IT LIKE YOU MEAN IT.

You just need to give it a good spray, question whether it will work or not for the next five minutes as it dries, and then be astounded when you walk back in and it is dry and does look really freaking cool.

Then you just need to put it on a nifty chain and wear it around. 

You should consider a clear coat or resin to keep it on there if you just tend to rough up necklaces.  Some people, they are obnoxious and perfect and always put things back right in their place in a nice neat jewelry box where everything has a spot...

Me? I pretty much just let life happen :).  Things are often found of mine in bags or on tables or just in strange strange spots here and there....

Basically, I am a good candidate for clear coats.

Also consider other options like chalkboard (decorate with a white paint pen), the hammered metal paints, crackle paints or other textures, or glow paint (I don't know why, but that could come in handy you never know).

Happy crafting! Pin It Now!

Tuesday, May 7, 2013

Icing Rosettes versus "Soft Serve" Icing

There are a zillion ways to ice a cupcake, but two are really quick.  If you use a big 1M tip and a large 18 inch bag you can whip out cute cupcakes in no time. 

For a rosette, you want to start in the middle and spiral outward. This is great if you want to transport them in a container without a lot of clearance.

For a look that reminds you of soft serve ice cream, start on the edge and spiral inward.  Make sure you have a box that is tall enough.

For mini cupcakes, squeeze the bag in the center and just do a quick dollop on them by keeping the bag in the center and letting it push outward naturally.

SWEET, and simple!

Happy crafting! Pin It Now!

Monday, May 6, 2013

Save Your Sole (tip for comfy feet!)

 Dr. Scholl's molefoam is by far the single best product I have ever used to save my poor feet.

I don't know about you, but nearly every pair of shoes I buy is uncomfortable in the back and cracks the back of my heel, especially before getting them broken in.

Molefoam, however, is super cushy and fantastic.  It sticks really well to the back of shoes.  It does not last forever on the back of them, it will wear off it you are out doing a substantial amount of walking (mine eventually wore off on my DC trip). 

However, at under 5 bucks per pack and coming with enough to cushy up multiple pairs of shoes, it is well worth it. 

All you need to do is cut a piece that will fit well in the back of your shoes, stick, and go. 

I buy molefoam at Meijer where Dr. Scholl's inserts are. 

Happy crafting!

Pin It Now!

Sunday, May 5, 2013

Amped Up Carrot Raisin Salad

Ingredients:
-about 4 large carrots, very finely shredded
-1 6 oz container of Chobani Pineapple Greek Yogurt
-8 oz crushed pineapple (in pineapple juice)
-1 small can mandarin oranges (drained)
-1 C raisins (I suggest jumbo medley raisins from Trader Joe's, if you can't get really plump and juicy ones, consider using golden raisins which tend to be softer)
-1/2 C mini marshmallows
-4 TB sugar

You basically just want to mix everything up in a bowl the night before you want to eat or serve it.  This stuff needs time to meld together or else it will just taste...well...

Healthy.

Instead of sugar you can use honey if you prefer, just start with a little squirt and work up to where you want it.  You can also consider coconut and pecans in it as well.  This made a pretty good amount, it probably would make about the equivalent of 5 small orders of carrot raisin salad at Chick fil a.

I have posted my skinny version my beloved side item of Chick fil a before, but this is another fun version we just concocted that is a hybrid between carrot raisin salad and ambrosia. 

Absolutely, 100%, don't skip out on using the finest shredding side of your box grater, or a hand grater with a fine shred on it.  That is the key to the soft carrots that we all know and love.  Crunchy carrots are just wrong.

Instead of getting 10+ grams of fat per serving with a mayo base, you get hardly no fat in the entire dish.  Chobani Pineapple is not one of the fat free versions but it is extremely low fat.  Other flavors to consider would be blood orange, banana, and honey.  Regardless, the Chobani yogurt will bring in a good amount of protein, the carrots bring in lots of tasty vitamins, the raisins provide ample iron, and the marshmallows just make you think you are eating something bad for you.

No harm in pretending!

Happy crafting! Pin It Now!

Saturday, May 4, 2013

Icing Roses and a Kentucky Derby Garland of Roses Cake

I have never been good at icing roses, mostly because I have the superhuman power of instantly melting icing.  A bad superpower for roses, a great superpower when you need to pipe stiff icing.

Luckily, my mom always makes a Garland of Roses cake on the day of the Kentucky Derby and agreed that I could loiter around snapping pictures of it.

So first you want to make three little mini-volcanoes one on top of each other on the rose nail.  You need a good base built up.  I guess technically if you had a big enough rose nail you could go as high as you like.

Next, you want to make petals that are oriented straight up.  About five of them should fit around the rose. 

 Next, you will make a row that points more outward for a more opened look.

You can get the rose off the nail with scissors, and then use the nail tip to push the rose off the scissors and onto the cake.

Roses work best with a stiff but workable icing that will set up quickly.  Typically meringue powder is a necessary component.
 Keep repeating this process over and over and over again until you fill up the horseshoe.

Then go back and add in leaves!

And then dig in to the most delicious Garland of Roses!

Happy crafting, and a very Happy Kentucky Derby Day!

Pin It Now!

Friday, May 3, 2013

Egg Frying 101


So it's really easy to fry an egg, at least in my opinion.  I rarely break yolks, I mean super rarely, and I chalk it up to a few simple solutions.

First, I like to use butter.  Half a TB or so, you can use Pam of course but I just like butter for frying eggs.

Some people use bacon grease, I find that disgusting personally.  If that is what you prefer, go for it.  I have very particular breakfast taste buds.

Anyway first and foremost crack the egg low to the skillet.  I cannot tell you how many people I have watched break an egg too high and it bursts the second it hits the pan.  I have mine usually a couple or inches above the pan and let it slowly fall in.


Eggs are like meat.  You really only want to flip them once.  There is no need to ever have to do more than that.

So you let it cook a little over medium heat until the egg whites start to turn white and bubble.  If the heat and butter is making the egg white bubble, it is because it is firm enough to move as a unit.

Next, when you go to flip it, send your spatula under it where the yolk is.  If you see the egg in the first picture, the yolk is clearly to one side.  START TO FLIP IT FROM THAT SIDE.  There is a lot less chance of it flopping off.

And DON'T pick it up and flip it mid-air, you are asking for a break.  I like to get it just a couple inches off the skillet and pretty much roll it over itself.  If you go in right by the yolk, you don't have to worry if the whole egg is on there and you can easily roll it.

Let it cook a few more minutes after the roll, you can usually poke the white with a spatula and make sure that it is firm instead of jiggly.  As soon as the white is firmed on the bottom side you are good to go and can slide it out onto your plate.

Gravity is not the friend of an uncooked egg. Don't fight it, use it to your benefit.  Cruddy pans are no good either, you HAVE to have a good skillet in life.

This may seem a very goofy craft of the day, but for anyone just starting out on their own, or in college, or whatever, it might come as some nice helpful tips.

I would have found it quite helpful when I began college!

I only like my eggs over easy and scrambled, so nailing a fried egg in the morning can make or break a day for me ;). 

Happy crafting!

Pin It Now!

Thursday, May 2, 2013

Lemon Cream: Rich and Dreamy Filling with a Chobani Twist!

I wish I had a picture of this as a filling in something, but I made the filling before I made the thing to be filled.  However, I would happily eat this with a spoon...so I count that as a win even if I don't have anything to put it in just yet.

Anyways, Ingredients:
-1.5 C vitamin D milk
-3 egg yolks
-1/4 C sugar
-3 TB flour
-1 tsp lemon extract
-1 TB butter
-1 6oz container Lemon Chobani
-Optional 3 TB powdered sugar

Heat the milk in a pan and bring it to a boil.  While you are getting that going, whisk the yolks/granulated sugar/flour in a separate bowl.  Start adding in a little milk, a TB or so at a time and whisk it in.

From my many years experience in watching Worst Cooks in America, we shall call this, tempering the eggs.

:) Watch TV enough and you might as well be a pro, right?

Anyways, once you have added a little milk, whisked, added a little more, whisked more, I did this about four times until the bowl (it was a little plastic container) started to feel warm in my hand. 

Lower the heat on the milk to low and add the eggs, whisking like mad.  Keep on whisking and cooking on low about four minutes, until it starts to thicken.  Remove from the heat and add in the butter and extract.  Whisk that in until it is combined.  Finally, add the Greek yogurt and whisk again.  Give it a taste and add in the powdered sugar if you want it a little sweeter.  I added it, and then added just a bit more extract, so it probably counteracted itself a bit.  Tasty regardless!

Pop it in the fridge and let it cool and thicken.  As you can see in the picture, mine ended up with a fantastic consistency once it cooled down.

If Bavarian cream and lemon curd had a food baby, it would be this.  It is great because it is thick and rich and creamy and all the things that you would expect something maybe made with heavy cream, but it is way lighter and has protein.

Seriously...delicious and has protein? I am ok with both of those.

In essence, you could do this with pretty much anything. Orange, raspberry, banana....

Oh my goodness...

Banana.

That is next on my list.

Happy crafting! Pin It Now!

Wednesday, May 1, 2013

Lemon Macarons

Ingredients:
-1 C Almond Meal mixed with 1.25C of powdered sugar
-1/4 C granulated sugar
-6 TB egg whites (about 3 large eggs)
-1 tsp lemon extract
-Yellow food coloring
-Pinch of salt

I separated the eggs this time instead of using liquid egg whites.  Icky.

Anyways, mix the egg whites, salt, coloring on medium speed until the eggs are frothy.  How much food coloring you use depends on how yellow you want them to be.  I just dip a knife down in the gel consistency color and that's just how much I add. 

Once they are frothy, crank the mixer up to high and start slowly streaming in the sugar.  Whip it (whip it good) until glossy, stiff peaks form.

Fold in the almond meal/sugar mix.  Put it in a piping bag, cut the tip off, and pipe out circles on parchment paper.  Hit the pan on the counter a couple times.  Let them sit for about 15-20 minutes. 

Once they have had a little time to form a crust, bake at 280 for 15 minutes. A lot of posts suggest opening the door a moment after the first 2 minutes of baking to release humidity.  I do that just in case.

I piped these out like I pipe rosettes, and I think that is why so many of mine cracked.  I could be wrong.  But when I made the shamrock shaped ones I piped it out in piles, if that makes any sense at all...basically I just kept my bag stationary during each one and let it create a mound.  The only place I really had cracking issues was where the mounds came together on the shamrocks.  I am thinking that with as stiff of a batter that is part of my issue.

If only I were back in my science fair days, that would be a delicious experiment to perfect macarons.

Mine look like some sort of mustard.  Maybe spicy brown.  That is because of a combination of A) the amount of yellow I used and B) I used Trader Joe's ground almonds which don't have the skins removed.  Personal preference for what you use, I like the low maintenance background here.

Plus it is visually interesting to me.  Making a cookie that looks like mustard is just a hoot.  These would be tasty with a lemon curd filling.  I am probably leaving mine unfilled for further rebellion.

Happy crafting! Pin It Now!