Hands down, this is my most delicious pizza to date. Spot. On. Flavor. Here we go:
Dough:
-2 C AP Flour
-1 C Whole Wheat Flour
-1/4 tsp yeast
-1 1/2 tsp salt
-1 TB honey
-1/2-1 C lukewarm water
This makes enough for two crusts of approximately this size, one super large crust, or one crust like this and something else, which is the method I always use. Mix all of the dough ingredients, starting with a half cup and working your way up as needed until your dough all comes together in a sticky shaggy state. I find that mine almost always needs more than 1/2 C. Let it sit overnight covered, I let mine sit in my gas oven, and raise (for me this is usually about 12-15 hours). Put it in the fridge the next morning and use later that day or allow it to sit for a couple of days in the fridge for added flavor development.
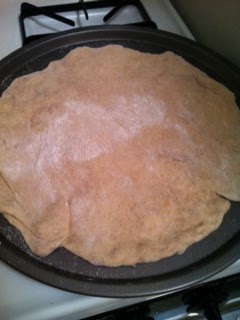
I meant to make mine Monday and completely forgot. Doesn't that figure. However, it still tasted phenomenal even without the extra days to raise. Turn half the dough out on a floured surface, flour the top, and press and stretch until you get the desired thinness. If a piece tears I tend to press it back together or add another extra piece (extras tend to stick better to the worked dough). Dust a pizza pan with cornmeal and transfer the crust to the pan. Let it hang out while you get the pizza ingredients ready.
Toppings:
-1.5 slices of bacon for a smaller sized pizza, more as needed for larger sizes
-6 string cheese pieces
-1/4 block of mozzarella, shredded
-2-4 TB pesto (I used about 3.5)
-4 large grape tomatoes, chopped
-about 1/4 C shredded spinach leaves
-Olive oil
-garlic cheese topper
-sauce
Get the bacon cooking in a skillet and cook it til it just starts to get crispy. Preheat the oven to 400.
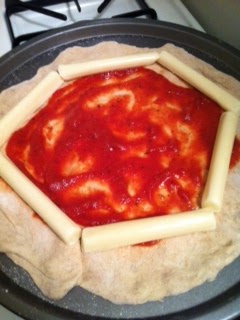
Drain the grease off the bacon by setting it on a paper towel, set aside. I would suggest putting the string cheese around the edge of the pizza first and rolling the edges over it so that you don't end up with sauce in your stuffed crust like I did. I don't know why I varied from my usual order.

Add the sauce, half of the bacon (I used kitchen scissors to cut it into small pieces) and the mozzarella. There is not a whole lot of difference between bagged mozz and store brand mozz blocks, but I still argue for shredding it yourself. Or if you can get super fresh mozz, even better!
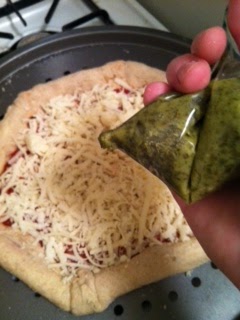
I put my pesto into a snack size plastic bag so that I could cut the tip off and squeeze pesto where I wanted it instead of trying to spread it. I was hoping it would make a pretty design, but mine was cold and that just didn't happen. It might be worthwhile to warm the pesto slightly, especially since you will be able to drain some oil off by doing so. In hindsight, that might have worked a touch better.
Add the pesto, tomato, and spinach leaves and remaining bacon. That's right, mine has bacon above AND below the cheese. Drizzle or brush EVOO on the crust and add garlic cheese topper. Bake for 18 minutes at 400.
Now, since I did not consider heating and draining my pesto beforehand, my pizza did have a little oil on it when it came out. I was not concerned by this and responded to it by grabbing a paper towel and letting it soak up the excess. When it is a homemade pizza with quality ingredients, I don't mind correcting little glitches like this. When it is super creepy frozen or delivery pizza that I have to do it to, that I mind. I like to know exactly what is creating the oil. Pesto will do that.
It is not, however, something to get overly concerned with because the pizza was FANTASTIC. I mean absolutely on point. It really hit the spot. I like this particular dough with the substitution of some whole wheat flour in it.
The cornmeal dusting is a MUST, as always. It helps the crispy factor!
Now all I need to do is decide what I want to use the remaining dough on...stay tuned!
Happy crafting!
Pin It Now!

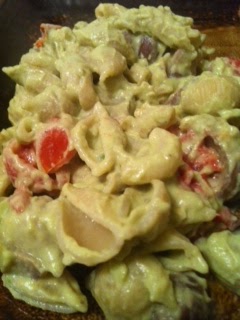 What I did not expect was the added benefit of how delicious this is as a pasta salad! I had leftovers and tried them for lunch and it was absolutely delicious. I used reduced fat cream cheese, and not much of it.