Sunday, June 30, 2013

Healthy Lunch Salad: Quinoa Stuffed Tomato with Feta and Yogurt Dressing

 Dressing Ingredients:
-3 oz Chobani Plain 0% Fat Greek Yogurt
-1 TB Olive Oil
-1/2 TB basil
-1/4 tsp crushed rosemary
-1/4 tsp garlic
-Pinch of salt

Other Ingredients:
-1 tomato, cored
-1/2 C quinoa, cooked as directed
-1/4 C or so crumbled feta (I used Fat Free from Trader Joe's)
-Optional slices of olive
-Salt and pepper

Get the quinoa cooking according to directions.  Mix all of the sauce ingredients together and set aside.  Core the tomato, I did this by cutting the core out and then using a spoon to scoop some extra insides out.  I made a few slits about 1/3 of the way down so that I could really stuff it with quinoa. 

When the quinoa is finished, let it cool for a moment and then mix with the sauce.  You could let it cool all the way, I just went ahead and put it all in hot.  Putting it in hot will thin out the sauce a little but to me that was not a big deal.


 I put a base of the sauced quinoa in the bowl I will use for lunch tomorrow so that my tomato would not tip over, and also so that if I ended up having more tomato than stuffing I had a little extra.

I tossed a tiny bit of feta around the edges of this. Add a little salt and pepper to this base.

Next I sat the tomato on the base and mushed it down to steady it.  I scooped quinoa in the tomato and packed it down in there.

Add a little salt, you could add a teeny tiny amount every couple of quinoa scoops if you prefer.

Top with feta and slices of olives, and a little bit of pepper.  I am going to chill mine overnight and take it for lunch in the morning. 


I was really scrambling for something super healthy to eat tomorrow, as I did not pick up fruit for fruit salsa.  Pasta salad just did not sound good, and I was a little limited on vegetarian ideas.

I have selective vegetarian tendencies, which pretty much means that after a weekend of eating a ton of restaurant foods or things I don't normally eat, I go vegetarian for a day or so to balance it all back out.

I wanted something protein packed, but had not picked up any more Chobani Flips, my absolute favorite yogurt.  When I saw online that quinoa was often used in cold salads, I was sold.  I just threw together flavors that I love.

Quinoa has a really cool texture, it is definitely more substantial than rice, which is just fine by me.

Happy crafting!

Pin It Now!

Saturday, June 29, 2013

Pottery Painting Fun

So we went to a pottery painting place (me and my best friend) for my birthday.  I grabbed this super cute bowl that I originally was going to make an ice cream bowl...

AND then I painted it to look like a flower.  Which I guess could still be cute as an ice cream bowl, especially if I made something like green tea ice cream.  That sounds tasty.

Anyway I used 2 shades of purple, 1 pink, 2 greens, a black, and a freckle paint.

Paint your own pottery places are super fun, and a great way to have a fun birthday, a tame bachelorette party, or just a fun day in general. 

I considered making a cool plate to photograph my food on, maybe I will save that for next time!
Here is the side of it where I put some cute little vines all around.  I think it will go in my bedroom that has a lot of natural colors in it.

After all, I have 8 sundae cups in my apartment and always need extra storage and cute things in my bedroom.

I had such a good time I would go back in a HEARTBEAT.  Even if painting isn't your thing, I think everyone would find enjoyment in these outings.

Happy crafting! Pin It Now!

Friday, June 28, 2013

Homemade Teriyaki for Stir Fry Night

 Did you know you can make your own teriyaki with stuff you have in your fridge and cabinet?!? YOU TOTALLY CAN.  One less condiment for my fridge. 

Ingredients:
-1 tsp ginger (use more if you are using fresh ginger)
-1/2 tsp garlic
-1/2 C soy sauce
-1/2 C warm water
-1/2 C light brown sugar
-1.5 tsp corn starch

Mix it up and use it on some kick butt STIR FRY!  You may need to warm it up a bit if you have extras because some of the brown sugar may settle. 

We like to make extra rice when we cook it that way we can use it in stir fry.
For this one we used peppers, mushrooms, onions, and pork on the electric griddle.  I love using pork in stir fry because you can use a couple of super thin tenderloins, which by the way are freakishly cheap in stores, and it is easily enough meat to go between two people.

That is my main reason I love mushrooms in stuff like this because they add another substantial texture, which makes it seem even meatier than it is.

I start my stir fry with a little soy or teriyaki in it, whichever I am using that day, and add more later on if needed.

Stir fry is a great way to use up veggies you have in the freezer or fridge, just make sure that things like carrots you either cut up in to small pieces or let them get cooking first.

I like my veggies soft and not crunchy personally.

Happy crafting! Pin It Now!

Thursday, June 27, 2013

Frisco Swap: Healthier Sauce with Chobani Greek Yogurt

Ingredients:
-1 6oz container Chobani 0% Plain Greek
-2.5 TB Ketchup
-1/4 tsp ish of Lowry's Seasoned Salt
-1/2 tsp sweet pickle relish (I used mostly the juice as opposed to the chunks)
-Pinch of pepper
-Pinch of garlic
-Optional tiny dash of onion

So basically you just mix up all the ingredients.  Because it is just that simple.

You may add a tiny bit more ketchup depending on your taste buds, but I really enjoyed how close this came out.  For not having the same fatty richness that a cup of mayo as a base would have, it has some absolutely fantastic flavor to more than make up for it.  I kinda want to put it on everything!

I am going to put this on a MEATLOAF SANDWICH tomorrow for lunch because I am crazy and I have always hypothesized that meatloaf would make a better burger than burger itself would.  Therefore, I should put my favorite burger sauce on it.  But that might just be because I love meatloaf.

You could also very easily put it in my cheeseburger pasta recipe, found at http://greenzebra9.blogspot.com/2013/01/bacon-cheeseburger-pasta.html , to make a whole new animal of amazingness.  You could mix it with cream cheese to make delicious wraps with maybe some BACON in them.  Oh man...my mouth is watering.

Lunch tomorrow is going to be epic.

Happy crafting! Pin It Now!

Wednesday, June 26, 2013

Meatless Monday: "Pizza" Quinoa with mushrooms and tomatoes

 Ingredients (about 1.5 servings)
-1/2 C Quinoa and 1 C Water
-1/2 C chopped mushrooms
-1 diced tomato
-1 TB basil (or more to taste)
-2 tsp crushed rosemary (or to taste)
-2 TB garlic cheese topper
-2 TB or so of white wine (I used chardonnay)
-Mozzarella
-Salt and pepper to taste

Get the quinoa going according to directions.  I did mine for 15 minutes with a little butter in the water and some salt.

Sautee the mushrooms and tomatoes on medium heat with the herbs, salt, and pepper in a drizzle of oil.
 When the quinoa has about 4-5 minutes left, add in the wine to the mushroom and tomato skillet. 

Reduce the heat and let it cook until the quinoa is finished, adding a little water if it starts to dry out.

Add in the quinoa to the skillet and mix around.  Taste and add extra herbs, salt, or pepper as needed.

Toss in desired amount of quality mozzarella and cover with a lid.

Turn the heat off and let it all sit, covered, for 2-3 minutes.


Give it a good stir, put some out on a plate and top with a few shreds of mozz or parmesan.

I really like quinoa, it has a different texture and it holds well against a lot of fun flavors. 

PLUS, it has protein.  I absolutely adore things that pack a protein punch.  I think that quinoa will be my definite consistent substitute for rice in stir fry, without a doubt.

Happy crafting! Pin It Now!

Tuesday, June 25, 2013

Pink and Zebra Cake

We LOVE foofy little girl cakes.  Not that tractors and dirt aren't cool...but I am a little biased towards zebra of course.

Regardless, we did this cake in buttercream and used fondant for the zebra stripes.  We used a larger writing tip to put the festive squiggles around the piping, and stuck black sixlets in the bottom piping.

Because seriously, every cake should come with candy. 

I did stars to do the lettering and then to fill in the heart.  I made an imprint with a heart shaped pan to serve as a guide. 

We painted the fondant with luster dust so that it would have a little shimmer.

Happy crafting! Pin It Now!

Monday, June 24, 2013

Dress Pants to Dress SKIRT

 I had dress pants that were far too large on me that I had bought a few years ago.  I pulled this unfortunate move of getting rid of all of my dress pants when I gained a little weight...and then I lost weight again. So pretty much I was left with dress pants that needed to come down a couple sizes.

My mom was going to take them in, but we quickly discovered that they had way too much material in all the wrong places.  I opted to take them apart and try my hand at sewing by making a skirt.  Using some very unconventional methods, we got it done! Here are the steps I used

Step 1: Take the inner side seams out of the legs and take out the seams in the seat as well.  Leave the outer side seams in because these are quality made and there is no need to waste them.

Step 2: Turn the pants wrong side out and put them on.
 Step 3: While you have them on, pin them to where they need to be.  I wanted mine to be a pencil skirt, so I had pinned it in tighter below my bottom.  Also pin an inch or two lower than where you want the skirt to hit and cut the excess material off.

Step 4: If you are like me you don't really understand one darn thing about sewing...but you DO understand linear regression.  Basically, I drew a line of best fit between my sketchily placed pins.  As it turns out, I can never sew a straight line until I specifically draw one on there.  I apparently just can't think in straight lines. 

Step 5: Use the sewing machine to put in the seams and cut off the excess material.  Put the skirt on and tweak and remaining oddball parts.
Step 6: Sew up the bottom hem.  This black skirt was done with a regular stitch (it blended in well with the color of the skirt) and the lighter one in the background my mom put a blind stitch in the hem.  I have no ability to tell you how to do that other than to get someone who knows how to blind stitch ;).

Step 7: Add any little embellishments you want.  I had JUST enough scalloped lace to put on the corner of this skirt. I pinned it where I wanted it and then sewed it in with my machine.  The way I see it, this will draw attention away from the fact that I did it myself.

The GREAT part about this method was that I did not have to redo the outer seams, the zipper section, OR the waistband.  You may have to readjust or remove a belt loop in the back.

The moral of the story is if you can relate something you don't understand to something that you DO understand, it all makes it a lot better.  I love remaking things into something that I can use.  I would have had to not only wasted the original $40 I spent on the pants, but would have had to spend another $50 or so to get two more of my favorite pencil skirts. 

Thrifty never looked so cute.

Happy crafting! Pin It Now!

Sunday, June 23, 2013

Quick and Easy Map Necklace

Sometimes you want something with a personal touch that doesn't take twenty-four hours to make.  I love maps, LOVE them, and this necklace took hardly no time to put together.

Buy the rectangular frames from Hobby Lobby.  Use the clear plate as a template and draw around a section of a roadmap, picture, memento of some sort, whatever you like and cut it out. 

You will also need a couple of jump rings and a ribbon necklace or chain, whichever you prefer.  Pick those up at Hobby Lobby as well.

You might consider Mod Podging the map, I am not sure exactly how water sealed the frame would be.  However, if you typically are well prepared with raincoats and umbrellas that may be of little concern to you.

...I get caught in a lot of rain storms unprepared...

Anyway just attach the frame to the necklace with jump rings and you are good to go!

Happy crafting! Pin It Now!

Saturday, June 22, 2013

Fresh Fruit Crisp: Leftover Fruit Salsa in a Tasty Dessert!

 Ingredients:
-1/3 C or so of fruit salsa per Ramekin (I used my peach mango fruit salsa recipe found here: http://greenzebra9.blogspot.com/2013/06/peach-mango-fruit-salsa.html )
-Equal parts flour, brown sugar, and oats (you can mix up a cup of each and store it in a Ziploc bag if you like, or mix up a smaller portion to suit your needs) about an inch thick
-1 TB butter per ramekin

Preheat your oven to 350.  Grease the ramekins, bottom and sides, butter is perfectly acceptable for that.  Put in the fruit salsa, then the topping mix of the flour, brown sugar, and oats.  Put the pat of butter on top.  Sprinkle with a dash of cinnamon sugar.

Bake for 22 minutes, with the ramekins on a cookie sheet.  It is good just in case something would run over, and it makes them much simpler to get out.
You will definitely want to let them cool a little bit before you eat them.  The mango especially holds heat well and you are going to get scorched if you try to eat it right off the bat.

These were FANTASTIC! We have always had fruit crisp off and on growing up and I have had it at various places throughout life and I love how vibrant this one was.  It had so much flavor, it was tart but sweet and it just tasted bright.

I HATE things that taste syrupy.  Some canned pie fillings are just fine and work well, but others just taste heavy.  I like things that taste as bright as real fresh fruit does.  This was honestly my favorite crisp I have ever had.

I am not sure exactly how well my other fruit salsa would work with something like this since it had kiwi in it.  This one had peaches, strawberries, and mangoes and they all played nicely.  I take fruit salsa all the time for lunch at work.

This particular batch of fruit salsa made me 2 days of lunch, we topped some fish with it for two people, and it made 3 crisps.  THAT my friends is a lot of meals out of less than ten dollars of fruit.  I would have spent more than that buying lunch out those two days. 

I highly suggest making these in ramekins...if we had a whole pan of it I would be eating it AGAIN. 

Happy crafting! Pin It Now!

Friday, June 21, 2013

Long Hair Fix: Complex Look with Simple Braids

 I always tell people that in order to be a prepared female it is NECESSARY to have adequate hairstyles for the zombie apocalypse.  Consider this:
-Tomb Raider/Angelina Jolie: Braided Hair, awesome female in action
-Hunger Games/Jennifer Lawrence: Braided Hair, awesome in action
-Most of the females in Mortal Kombat: Braided hair, ridiculously awesome

My point is that all the great kick butt females have braids.  Or at least all the ones I mentioned.

To do this braid all you have to do is the one sided French braid technique.  You will only pull hair from the outside of the braid.
Here is my sketchily created diagram of what I did.  I started at the side of my head with a small section of hair.  I crossed from both sides a few times before I started pulling hair into it.

After those few times, I start pulling hair only when I crossed from the one on the outside (toward my face).

When I got down to my ear level I decided to lateral back around my head.  I only pulled very small sections this whole time.

This allowed me to secure the braid in with pulled hair while still having hair below, as seen in the second picture.

Basically, I only pulled sections to incorporate with the braid that were right where I wanted the braid to lay.

I continued that pattern all the way around and up, still only pulling hair and incorporating with the one coming from the outside. 

When I got all the way around and back near my braid, I stopped pulling hair and braided it regularly to make it easier to poke through.  I then poked it through a section of the braid, unbraided the excess, and went back to the method I had been using of incorporating hair with the sections pulled from the outside.

I continued to do this in a series of loops, braiding out the end and securing it with bobby pins under another section. 

It looks difficult, and may even sound difficult, but it was actually really easy since it is the same technique the whole way through.  If you can French braid, you can EASILY do a braid like this. 

I have a couple of other styles I am going to try with this soon.  When it is 90+ degrees outside, I LOVE having my hair all up without it looking like I just tossed it in a ponytail. 

Happy crafting! Pin It Now!

Thursday, June 20, 2013

Tasty, Healthy Pasta Salad with Chicken

Ingredients:
-1 package whole wheat Buitoni tortellini
-1 6 oz container of plain 0% fat Chobani Greek Yogurt
-1/4 C Pesto
-1/2 C shredded chicken
-1/2 tomato, diced
-2 black and 1 green olive, sliced (seriously, you slice them thin and only use a few its all you need)
-1/2 C crumbled feta
-1/4 C fresh shredded parmesan
-1 TB basil
-1/2 tsp crushed rosemary
-1 TB garlic cheese topper
-Salt and pepper to taste

Cook the pasta according to package directions, drain, and let cool for a few minutes. 

Mix the remaining ingredients together and add salt and pepper to taste.  Refrigerate overnight and enjoy.

The great thing about it is the vast majority of the dressing is Greek yogurt, and by adding in the extra herbs you get a lot of flavor without needing to increase the pesto AND a lot of protein.  I do love sneaky protein.  I also used fat free feta from Trader Joe's, it is delicious!

The pasta is honestly so tasty that no one would ever know it is whole wheat. Doubly sneaky.

Happy crafting! Pin It Now!

Wednesday, June 19, 2013

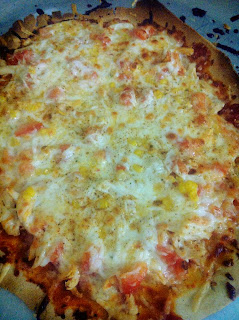
Homemade "Mexican Pizza": A Taco Night Twist

(Recipe designed to feed 2)
Crust:
-1C Corn Flour (find it on the international row in your local grocery)
-1 TB butter, softened
-A little under 2/3 C water
-1 tsp salt

Toppings:
-2 Chicken tenderloins (or one chicken breast)
-1/4 C corn
-Pizza sauce to taste or salsa
-1/2 tomato, diced
-Mozzarella, pepperjack, and asiago cheese
-1/2 TB taco seasoning
-Salt, pepper

Plop your chicken in a pot of salted water and let boil for about 30 minutes or so, until it is tender enough to shred with two forks.

Meanwhile, mix the crust ingredients and knead, adding the first 1/3 C of water and then increasing slowly until it comes together.  You want it to be just moist enough that it holds in a ball but still can be pressed out without crumbling apart.

Put the dough between two sheets of saran wrap and use a plate to press it out.  Finish rolling it out thin with a rolling pin. The plate saves a lot of time. 

Spray a pizza pan with holes in it with cooking spray and peel the top layer of saran wrap off.  You can use your hands to press out the dough more if needed.  Flip the crust onto the pizza pan and bake at 400F for ten minutes.

Pull it out of the oven, top with the above ingredients and sprinkle with taco seasoning, salt, and pepper on top the cheese.  Pop it back in the oven for 10 minutes, then switch over to broil until the cheese just starts to brown, watching carefully.  Your crust may get a little tiny bit dark but it turns out being crispy and fantastic, so don't worry.

The crust really does taste like a tortilla chip or similar and makes a delicious thin and crispy pizza.  You could put some sour cream in a baggie and cut the tip off to pipe a little over the top of the pizza.  I used to really like Taco Bell's Mexican Pizzas before I pulled away from eating fast food all that often. 

This fed the both of us with a couple of pieces left over (we cut smaller pieces similar to a flatbread due to the oval shape I had pressed it into).  For anything over two, I would double the recipe or have a lot of sides to go with it. 

This meal is really inexpensive because it does not require a lot of meat.  The two chicken tenderloins were actually a little more than I needed for the pizza size, and I used probably a third to half a cup of it for a pasta salad recipe that will be featured tomorrow.

There are a LOT of ways to cut back on grocery bills, and finding ways to stretch meat farther is a great one in my opinion.  Even the crust in this pizza has a lot of great flavor being made from corn flour, and you will absolutely not sacrifice any flavor using such a small amount of meat.

Happy crafting!

Pin It Now!

Tuesday, June 18, 2013

Sweet 16 Cake

So this cake was our first ever hexagon cake, which you can find my already math-ed out tutorial on cutting squares into hexagons here:

http://greenzebra9.blogspot.com/2013/06/turning-square-cakes-into-hexagon-cakes_14.html

The flowers are my gum paste skills sneaking into the cake lineup again, which I did using absolutely no tools except Reynolds wrap.  Want to know how I managed that?  Well it just so happens I blogged on that too:

http://greenzebra9.blogspot.com/2013/06/gum-paste-cherry-blossoms-creative.html

Anyway you need to make the gumpaste at least a day in advance, preferably about two.  It gives it plenty of time to dry, and it is much more reliable than fondant in my opinion.

I really hate fondant for the record.

The letters are chocolate, and the 16 is actually a candle covered in the same chocolate that the letters were done in.  Which makes it the right color, AND totally useful for the whole, ya know, birthday part of all this.

I used a small star tip to pipe some scallop-esque shapes around the top of each layer as that really helped fill it out and tie it all together.

The flowers were put on with dabs and piles of icing to make them stay where they needed to be. 

The colors matched the pallet of the party which was light pink, dark pink, orange, and aqua.

I used a larger round tip to pipe dots around the bottom, pressing in any little peaks that were leftover.

The bottom is a 12, the next an 8, and the top a 4.5 square (turned hexagon).

Happy crafting! Pin It Now!

Monday, June 17, 2013

Peach Mango Fruit Salsa

Ingredients:
-1 quart of strawberries
-4 very soft very ripe peaches
-2 very ripe mangoes
-1/4 C honey
-juice of half a lemon and half a lime
-zest of one lemon and one lime
-1/2 tsp cilantro

All you need to do is peel and chop all the fruit and toss it in a bowl with the remaining ingredients.  Make it the night before you need it so that it has time to sit and really infuse all the flavors.

Mint would also be a reasonable spice to use. 

My favorite thing to put fruit salsa on is Food Should Taste Good tortilla chips/crackers.  The sweet potato flavor is fantastic with fruit salsa and also tastes AMAZING with hummus.

At Whole Foods, I found the lime flavor of the FSTG crackers and they are phenomenal.

Whatever you do, I beg you deeply, do NOT I repeat do NOT buy Lime Flavored Wheat Thins.  They really do not taste like lime at all, which makes sense because Onion Powder and Garlic Powder are listed well before lime juice.

Basically, they taste like funyuns.  You know what I really hate? Funyuns.

Opt for the tasty chips from Food Should Taste Good, their lime is spot on.  I also like to make my own wheat scoops chips and add a little cinnamon sugar.  Graham crackers are another option.

I take this for lunch a lot because it is sweet and tasty so I feel like I am being terrible and indulging, but in fact I am getting a lot of vitamins and healthy mumbojumbo.  This and my pineapple version with kiwi, pineapple, and mango have been fun summer treats.

Also to consider is using this as a topping on fruit pizzas, ice cream or sherbet, waffles, and even grilled fish.  I love the pineapple version on swordfish.

Happy crafting!

UPDATE: Have some leftover and want another creative use for it? Check out this post about turning it in to a delicious fresh fruit crisp! http://greenzebra9.blogspot.com/2013/06/fresh-fruit-crisp-leftover-fruit-salsa.html Pin It Now!

Sunday, June 16, 2013

Redneck Cupcakes: Deer, Weapons, and lots of CAMO

So...I had a picture of how cool the camo batter was...and I hit delete instead of email.

OF COURSE.

Anyway, the cupcakes themselves are camo for the two with grass on top.  I divided the batter out into the main bowl and 3 ramekins.  I added black cake coloring to one, green to another, and brown to the third.  I put half tablespoons of batter in, alternating the colors until they were 2/3 of the way full. 

To decorate these, I mixed german chocolate (pecan coconut) icing with regular buttercream icing to make the deer.  My dad (and me too!) loves German chocolate cake.  I smeared it on with a spoon and then used my fingers to bring in the sides toward the bottom to make it look more like a deer face. I mixed it with our wedding cake icing so that it would set, as well as so it would give me a light brown without adding extra color.

I broke pretzels to use as antlers, and I would suggest dipping them in chocolate  because they get real stale real quick.  I used a black sixlet for the nose and cute googly eyes.

For the "hunter" cupcakes (which everyone kept calling cookie monster) I used the grass tip and a leaf tip to create a mound of icing where the hunter was hidden.  Clearly he is a hunter that is afraid of heights and did not want to get in a tree stand so he has elaborate camo.

That is my story and I am sticking to it.

I added googly eyes and then melted some chocolate.  I put the melted chocolate in a Ziploc bag, cut a tiny bit of the corner off, and freehand piped some bows and arrows and guns.  Pipe them on to wax paper, let them cool a few minutes or refrigerate them real quick, and use a thin metal spatula to get them off.  Be very careful and make extra, odds are you will break a few.

For the other cupcakes I used the grass and leaf tips to make a forest floor type setup, as well as piping some twigs in brown icing.  You could do that in chocolate as well.

For all of my green, I dipped a knife in brown and one in black and ran it up the sides of the icing bag before I put my green in.  This gave me a camo, woodsy, variegated color in a super simple way.

They were a delicious way to celebrate Father's Day!

Happy crafting! Pin It Now!

Saturday, June 15, 2013

Pink and White Wedding Cake: Scrolling, buttercream, and gumpaste flowers

This is going to be short, sweet, and to the point because I am wiped out after all the baking this weekend.

This cake is almost entirely buttercream.  The top flowers and flower on the side are gumpaste.  All of the scrolling, piping, and similar is buttercream.

If you are not in the market for a five tier cake, the top three layers would make an equally adorable and very much still impressive smaller cake. 

We did the ribbon band around the second layer with the largest Wilton icing tip that is used for base icing.  By putting the cake on a turn table and resting your hand on the edge of the table where you are decorating, it is pretty simple to get it fairly straight.  I put a beaded trim of icing above and below it.


Here is a closer up view of the top couple of layers. The heart topper was just a hair wider than the top layer, which made a really adorable impact on the cake.

As stated in a previous post, those flowers on top are gumpaste and made around blow pops.  The smaller sticks of suckers were great to pop into a cake top, and the suckers saved me from having to waste a lot of gumpaste in a core.

The center of the decoration on the top layer is a white sixlet.

All in all we were very happy with the end product.

Happy crafting! Pin It Now!

Friday, June 14, 2013

Turning Square Cakes into Hexagon Cakes


The first step in this process is to make a template.  This picture shows the sizes I used, I was mostly just concerned with the front panels increasing relatively evenly.

I cut mine out of cardstock scrapbook paper with a big o paper cutter.  You may want to measure it just slightly skinnier than your pan (subtracting maybe just an 8th of an inch off each side) or you can just adjust as needed on the fly.

We adjusted on the fly of course.

So when your cakes come out of the oven, go ahead and ice between them and layer them on to each other without cutting them.

AFTER they are stacked is when you want to cut them as it is less difficult to get them even if so.


If you are doing a stacked cake, you can use the same templates on the boards.  Our cake was just shy of the same size as the template, but it was very simple to improvise.

Use the big giant Wilton tip that is commonly used for base icing.  I pipe mine with the flat side facing out because I think that the ridges on the other side help it stick to the cake.

Trust me, you need this tip for cut cakes.  It makes cakes in general far simpler, I must say, but it is imperative that you use it when you are shaping your own cake.

After you get icing strips on you can go all around and smooth them out and decorate as desired.


Here is the super cute tiny top layer. 

This is the first cake we cut and I did not consider this difficult at ALL, especially having the large Wilton tip.

Happy crafting!
Pin It Now!

Thursday, June 13, 2013

Gum Paste Flower Tutorial

You will need gumpaste in the color you want and BLOW POPS!

That's right.  My mom is pretty much a genius.  I was moping about having to make cake pops to get a good core for this full flower, and she piped up with the awesome idea of using blow pops.  That is multiple hours saved!

I pull off pieces of gumpaste, balls about the size of just larger than a pea.  Next, smoosh the gumpaste out nice and thin to form a nice big petal.

The first petal should stick just fine to the sucker, but if not just add a little touch of water and it will stick.


 For the first layers of petals, you don't have to worry about them going all the way to the bottom because you want to build up a nice thick middle so that the whole flower looks full.

So keep building petals like the first, overlapping them and using a little water as needed to get them to stick.

I would suggest orienting the tops of the petals in toward the center and taking care to cover up the sucker in the middle.

With each petal that you put on, you can press the edges and roll them just slightly between your fingers to get them to be just paper thin and fluttery.

I used a cake pop drying stand to hold the gumpaste flowers.  they are very heavy, so make sure to use something substantial.
I will let these dry overnight and then tomorrow I will mix Vodka and Luster Dust to paint over the outsides and the rims of the flowers. 

That will add depth and sheen and make these the perfect flowers to sit on top of a cake.

I actually trust gumpaste a lot more than fondant as it is pretty reliable once it dries.  It is also super easy to get it out thin.

Happy crafting! Pin It Now!

Wednesday, June 12, 2013

Gum Paste Cherry Blossoms: Creative Molding Trick

I would consider the little four petal flowers that are needed all over the sweet 16 cake we are going to do to be cherry blossoms. I wanted to make some in gumpaste to put on the sides of the cake and to add more depth and texture throughout. 

These were very simple to make and required minimal tools. All I did was make up some gumpaste, pull off a very small piece and roll it in to a pea sized ball.  Next, I used my fingers to smash and shape the pea into a large flat disk.  I tore about 2 cm or so in on four different places to give me petals.  I pushed in and curved the sides of the petals and pressed them against the next petal over.

Then, I mooshed the edges of the petals and pressed them in to slight curls to give it some movement.

To dry them, I tore off 6 inch sections of Reynolds wrap, folded it over and over into a flat but fairly sturdy stick, and then pressed it between my fingers to make a wave the whole way through.  The flowers sat in the dips in the wave to make sure that they had a slight curve.

I think that these will supplement the icing flowers that will be more flat quite well.  Some will be icing and tasty, these will be delicate and dusted with pearl dust.  I hope that it will create something very visually interesting while still keeping the much preferred taste of buttercream instead of being solely gum paste.

Always let stuff like this dry overnight and by all means keep your remaining gumpaste tightly sealed if you do not use it all.  These will be stuck on with buttercream.

Happy crafting! Pin It Now!

Tuesday, June 11, 2013

Super Quick Homemade Thin Crust Pizza: 3 Cheese Supreme

Crust:
-1.5 C Flour (1 C AP, .5 C Whole Wheat)
-1 tsp honey
-1 tsp baking powder
-About 3/4 C lukewarm water
-2.5 TB butter
-1 TB garlic cheese topper (I like Shipshewana, McCormick is also decent and can be found most anywhere)
-1 TB basil
-1 tsp Rosemary (crushed)
-Salt

Toppings: Pepperoni, sauce (duh), green peppers, sausage, mushrooms, olives, mozzarella, parmesan (fresh), asiago, garlic cheese topper (just a pinch), salt (pinch), fresh cracked pepper (just a hint)

Mix all of the crust ingredients together, turn out onto a floured surface.  Dust the top of it with flour and roll out thinly.  Add more flour as needed.

You have two choices next.  You can either plop it out on a griddle and cook it until it starts to brown on each side, or you can bake it at 350 for probably about 10-15 minutes.  I say about because I definitely have not baked one of these, but have baked little chips and such of the same dough.  Griddles are basically one of my favorite tools, and it is way faster.  But you could easily bake it until it gets crispy.

Anyway, after it is cooked, add your toppings and place it in an oven heated to 400 degrees for about 8-10 minutes.  I personally brushed my edges with butter and put some more garlic cheese topper on them.  I ALWAYS put a pinch of the topper, salt, and pepper over my pizza toppings because it helps add a little flavor to otherwise somewhat bland cheese.  I like to have the same flavors be in the crust, on the crust, and on the toppings to help tie the pizza all together.  I also use really fresh, block cheeses that are in my opinion much higher quality than preshredded, so that makes the flavor and texture, and meltability, far better.  After baking it for 8-10 minutes, switch it over to broil and let it go until the cheese just starts to brown.

And then devour the whole thing because it is delicious.

This idea started with my sister who made some quick pizzas on tortilla shells a few nights ago and was telling me about how tasty and crispy they were.  I make homemade tortillas a lot, and was determined that I would try it to see if I could make a large pizza.

The benefit is there is no raising required like there is with some dough, so truly you can just throw it together on a whim if you have all the ingredients.

Happy crafting! Pin It Now!

Monday, June 10, 2013

Painting in a Faux Chair Rail

So we are in the process of fixing up an old historic home. It used to have chair rail in it, but now just has really rough walls from where it was ripped out previously. 

I mulled over trying to put actual chair rail on, but eventually decided I would paint it instead.  In the same theory that I have always used on clothes:  light reveals, dark conceals.  A deep brown paint was just the ticket.

Below the chair rail is painted in Behr paint+primer Oregano Spice.  Above the chair rail is Behr Mushroom Bisque, and the chair rail itself is Behr Ancient Root.

As you may be able to tell, I only use Behr.

Why, you ask?  I like Behr because it is thicker.  It almost always gets me out of doing a second coat, and when I am painting with a roller it doesn't splatter all around like other paint.  Behr has never let me down on a color, either, they are always very true to the paint chip.

Now, speaking of Behr paint chips, let's talk about that chair rail.  This chair rail is approximately the size of the large Behr single color paint chips at Home Depot.  How convenient ;).  I used the paint chip as a guide the whole way around my room because I happen to not own a laser level or anything like that.  AND MOST IMPORTANTLY, USE GREEN FROG TAPE NOT BLUE TAPE.  Frog tape is a heck of a lot better, and much more inclined to stick on satin finish paint which is all I use.

To anyone freaking out that they would get a really crooked chair rail, odds are you won't if you use something consistent like a paint chip all the way around.  Tape off in 1 foot or so sections so that you will have less of a tendency to put the tape up severely crooked.

Most importantly, don't worry about the little glitches that will inevitably occur.  In this picture, the paint job is good enough at a distance that you can barely tell that there is an electric conduit tube running down my wall near the corner.  However, if you got up really close to it you would notice a few errors.

My point is, you put a LOT of furniture and similar in a room that breaks up the chair rail and paint.  If it is not 100% perfect, most people are going to notice, and polite people won't say a word about it.

If you are wondering why I do not have baseboard right here just yet, I haven't been real overly concerned with this part of the room because my bed will be along this wall.  And yes, I really would be perfectly fine leaving a baseboard off or postponing putting it on simply because my bed will cover it.

I am never joking when I say I am a realist.

I wanted a lot of the brick left exposed in the room instead of it all being patched because I am going with a vintage type feel in the room.  I actually want the age and wear and tear to show in some places, and I have always loved exposed brick. 

AND the best part is I got that huge chandelier which no one any taller than me can walk under for $50 at a flea market :).  Don't worry, I will be putting a table under it so that no one feels inclined to walk under it of course.

Happy crafting! Pin It Now!

Sunday, June 9, 2013

Engagement Picture Cookies

A recent bride had a really fun request of getting their engagement pictures put on cookies to serve at the reception.  We did a combination of square cookies with fluted edges and heart shaped cookies. One heart got a larger picture of the happy couple, and the rest of the hearts got scrolling similar to what was going on the cake (the red and white one of yesterday's post).

This was done with sugar cookies, royal icing, and edible images.  We finished the majority of the cookies off with a shimmery edible glitter.

You want to put the images on while the icing is wet.  I suggest not using anything but white icing for edible images because the color really will distort lighter parts of the cookies.

You have to be careful with them, they are delicate and will tear if you let them get too warm. Do not let them get too hot in a car, it will completely mess them up. 

We get our edible images done at a cake shop and make the cookies and icing ourselves.  If you don't have any local place you can get them, or just don't want to do the cookies, check with bakeries nearby.  Most places, Kroger included, should have the printers and will make the cookies or put the images on a cake for you.

Happy crafting! Pin It Now!

Saturday, June 8, 2013

Wedding Cake: Red and White Roses, Heart Scrolling

For this wedding cake, it used a cascade of red and white full roses, rosebuds, and green leaves.  If you are doing a stacked cake and are going to build a cascade, you really need to start from the bottom and work your way up.  If you have roses pre-made you can stick them on with fresh icing globs beneath them.  You can also make them as you go, but depending on the height of your layers you may need to make icing dams and ledges for them to rest on.

For the heart scrolling, I used a large heart cookie cutter to put the outline in the base icing.  I used a wider writing tip to make the lines, and then freehanded the scrolls and dots coming off of them.

I suggest making little dots on where your roses are going to be and then making the scrolling.  That way, you don't have to scroll any more than needed and you also don't have to have a heart awkwardly or partially covered.

The icing around the bottom of the layers is a small discrete rosette piping, as we wanted the main focus to be on the heart scrolling the bride chose and the beautiful flowers.

We were really happy with how this cake turned out, it looked beautiful and luxurious with the full cascade.

Happy crafting! Pin It Now!

Friday, June 7, 2013

Heart Cookies with Various Scrolls

Royal icing for us is stiff enough to not run over the side of a cookie but fluid enough that you can quickly flood a cookie.  If you are careful and deploy a little strategic maneuvering, you can still easily make pretty designs in the cookie without needing to make a stiffer icing.

For the cookie on the left, I made the scrolled outline first, let it set, and came back and filled in the rest with a thin layer of icing.  Then, I did a second layer over the scrolling. 

For the cookie on the right, I did the base layer of the icing and let it dry.  The more you let it dry the better the top scrolling will stand up.  I made sure to not squeeze an excess of icing out and made a very simple but elegant scroll with the icing bottle.  These two cookies create a more interesting design than just a plain ole heart and will make cute edible delights at a wedding we are making them for.

My main recommendations are not overdoing it, not doing designs too close, and being patient enough to wait for it to set if you are using one of this consistency.  If you want the simpler of the two, use the style on the right.

Happy crafting! Pin It Now!

Thursday, June 6, 2013

Leftover Usage: Fajitas

 I thrive on meal planning when I am at school, it really helps me budget and use things to the max.  I always attempt to find ways to use leftovers for lunch or dinner the next day.  A lot of things are simpler to make in a larger quantity to start with, like steak.  I may actually only eat a half of a steak in one sitting as I like to eat smaller portions of meat sometimes, but the rest of it NEVER goes to waste.

One thing that is great to use is chicken and steak.  If you have some leftover, you can toss some onions and peppers on a grill with a little butter, seasoned salt, and pepper.  You can use a Mexican seasoning if you like of course.

Depending on how done you like your veggies and if your meat is leftover or fresh, you may give the veggies a few minutes head start.
Just cut your meat into strips, plop it on the griddle, and let it reheat.  Once it is heated through and your veggies are cooked to your preference, you can assemble the fajitas with all of the desired toppings.

We put a little pat of butter in with the meats too to keep them nice and moist.

Just a couple of strips of steak, for instance, on a tortilla can be a very satisfying meal.  You can load them up with tomatoes, guacamole, roasted corn, and anything else you like.

Creative uses of leftovers will make for delicious and exciting meals back to back and serve as a great way to reduce your waste and help your budget.

And for college, I am especially concerned with managing my budget.

Happy crafting! Pin It Now!

Wednesday, June 5, 2013

All Power, No Flour Muffins

Ingredients:
-1 and 1/4 C Oats
-2 large carrots, finely shredded
-1 Container Chobani BeeNana Flip (5.3 oz, yougurt and flippy yumminess)
-1/4 C fresh, finely chopped pineapple
-1/4 C dried berry blend mix via Trader Joe's
-2 TB locally sourced honey (I used clover honey) via Whole Foods
-1/4 C Almond Meal (Trader Joe's has great prices on it)
-1/4 C Chopped Pecans
-3/4 tsp baking powder
-1 single serve container of cinnamon applesauce
-1 egg
-3-4 TB Cinnamon (seriously these can handle more than you would imagine.  I used probably 1.5-2 TB the first time and it was not near enough)
-1 tsp ginger (I did not use nearly enough the first time with just a shake or two, I would go with a full tsp)


You just need to mix all these ingredients together, I mixed it up by hand for once.  Grease a mini muffin pan and fill pretty much full, as they won't do much raising.  Bake at 350 for 15-20 minutes until they are starting to brown and firm.

Let cool for about 10 minutes in the pan, and then transfer to a wire rack.  You may need to use a knife to loosen the edges.  I sprinkled a little cinnamon sugar on top.

I do not profess to be a nutritionist in any way shape or form. However, I do at least know that a muffin made without oil and butter and with applesauce and Greek yogurt is probably a much better choice.  Chobani Greek is packed with protein, carrots are loaded with fiber, and all of these fruits are packing some pretty fantastic amounts of vitamins.

Basically I made these because I want a quick bite I can pop before I go running in the morning.  That's right, the self proclaimed hater of running is trying to convince herself to take it up.

It turns out it is a lot more difficult when a coach isn't yelling at me.

However, I am a human that does not do well without food right when I get up.  That is why I am calling these All Power muffins, I need something that will be a healthy little bite before I go try to up my cardio.  I don't want to eat a full out breakfast and then run because that would make me sick.  I would rather pop a couple of these, hit the road, and eat breakfast when I get back.  So that is the plan for now.

These have a really bright flavor as is, even though I did not get enough spice in my first batch, so don't worry too much if you think you have it a little underspiced at first run.  They will still be tasty if you use quality ingredients.

Happy crafting! Pin It Now!

Tuesday, June 4, 2013

Garlic Cheese Knots: Dough Made with Greek Yogurt!

Ingredients:
-3/4 C AP flour
-1 6 oz container Chobani Plain Greek Yogurt
-Salt
-3/4 tsp baking soda

Mix all of the ingredients together, adding a little water if dry.  Turn out onto a floured surface and knead for about 5 minutes, dusting with extra flour as needed.

You want to get it to a consistency that you can roll out between your hands.  Break off hunks about the size of a ping pong ball, roll, and twist into a knot.  It should make at least 8 knots.

Brush with butter* and sprinkle with garlic cheese topper and fresh grated parmesan cheese.  I would also suggest adding a hint of sea salt, as the dough is naturally a little more sweet to begin with since it uses yogurt.

I baked these at 400 for 14 minutes on convection because I was also making a pizza.  I greased the cookie sheet with butter (a light cookie sheet as I am home for the summer).  IF I was making these and not making a pizza, I would probably knock back the heat and let them cook lower and slower, at 350 until they get golden brown.

Now, as to my * note above.  I brushed mine with a little butter, that is true.  However, I really think that melting butter, dipping the tops of the knots in butter and then dipping it in a garlic topper/parmesan (heavy on the parm) topping and setting on a greased cookie sheet would work out better.  I consider these to be one of my works in progress.

Another option is to leave out the salt and add a pinch of sugar, then you could roll the knots in butter and a cinnamon sugar mix and bake cinnamon knots.  A quick powdered sugar and milk glaze or similar would be delicious as a dipping sauce or drizzle.  That idea reminds me a lot of something I used to do in home ec classes in high school and similar, and they were always one of our favorite days to be in class!

It is a super simple dough that is a mix between a pizza dough and a cake, but is good for a quick little side.  You can also use it as a pizza dough or similar, make cheesy breadsticks, and whatever else your crafty little self can come up with.

Happy crafting! Pin It Now!

Monday, June 3, 2013

Skillet Grilled Cod with Fruit Salsa

We bought some delicious looking cod at Trader Joe's.  First and foremost, we liked the idea of our fish being a product of the USA.  Good job to you Trader Joe's.  Good job to you.

Anyway, on just over medium heat grease a skillet with a little butter.  Drop the fish in the skillet, season with seasoned salt and pepper for a mild flavor or blackening seasoning for a kick, and cook on each side for about 3 minutes.  Like most meats, you really only want to have to flip it once.  But fish is especially sensitive because it has a tendency to fall apart if it is overhandled.

If you are a newbie cook or inexperienced with fish (I think I qualify on both counts) you might want to cut it in half to make sure it is done.

We served this with my fruit salsa of a last week, which has mango, kiwi, pineapple, honey, and a little mint. It was made with all fresh fruits and herbs, the fruits were also products of Trader Joe's and the honey was locally sourced honey that I bought from Whole Foods.

We served it all over rice.

Happy crafting!
Pin It Now!

Sunday, June 2, 2013

Savory Clafoutis: Quiche-like dish with eggs, Chobani Greek Yogurt, Veggies, and Mozzarella

Scrolling through the paper this morning we found an interesting recipe for clafoutis, which are typically a French dessert that has cherries.  However, the article also mentioned making savory versions, and I was SOLD.  Here is my version:

-4 eggs
-2 TB flour
-A little less than 1/2 C almond meal
-1 good sized baby portabella mushroom, chopped (more as desired based on size of baking dish and love of mushrooms of course)
-a handful of cherry tomatoes (halved)
-about 3 ounces of mozzarella, cubed (FRESH mozz, please)
-7 TB Chobani Plain Greek yogurt 0% fat
-7 TB milk (whole)
-1/4 tsp crushed rosemary
-1/2 tsp Basil
-1/2 tsp garlic cheese topper
-Salt to taste
-Pepper

Butter a pie dish that is about 7 inches or so in diameter. I had a little batter leftover (probably at least a half cup), which I think is because I used some chunky veggie pieces, so you might be able to use a slightly bigger dish and be just fine. Whisk the eggs in your mixer with the salt for a minute or two, then add in the greek yogurt and milk, and herbs.  Mix that until incorporated and then mix in the flour and almond meal.

Put the mushroom pieces, tomato halves, and fresh cubed mozzarella on the bottom of the dish.  Add a little salt (I suggest sea salt) and pour in the egg mixture.  Bake at 350 for about 37 minutes (essentially 35 to 40 depending on your oven and how done you prefer it to be). 

This particular flavor combination had the undertones of a fresh pizza or delicious Italian dish.  We put a little fresh grated parmesan on top of it. 

You could make pretty much any flavor combination you wanted with this.  It can easily be a breakfast food or dinner food, depending on the combinations.  You can safely feed two with this particular recipe, and should increase it as needed for larger gatherings.  Also to consider would be baking it in well greased muffin tins, or even mini muffin tins for use as an appetizer or on the go breakfast.

Originally the recipe called for heavy cream, which I subbed out for Greek Yogurt.  That ups the protein and brings down the fat content all at once, which I consider a major plus.  The dish is still plenty rich and filling, and extremely tasty.  You can pretty much have this thrown together in five minutes!

Happy crafting! Pin It Now!

Saturday, June 1, 2013

Hello Kitty Cake

So believe it or not, I have never really been a Hello Kitty fan.  It could partly be due to my age, although I sure do see a lot of Hello Kitty backpacks on campus and notebooks in college courses...so maybe it was just never for me.

BUT, I love to put it on a cake.  Hello Kitty, while not my cup of tea, is super cute and always fun.  The nature of the cute cat lends itself well to whimsy and fun, so that is why I offset the character to the edge.

To do this cake, I put all of the base icing on and got the cake smooth.  BEFORE I put the piping on, I used a round cake pan to press into the icing, about 2/3 of the pan over the corner of the cake.  The size you need for this will vary by how big your bottom cake is, but any mixing bowl or similar round object will be perfectly acceptable.

After that was pressed in, I used my offset spatula edge to trace in some ears.  Then, I piped the cake edges with a fluffy bright pink icing.

Like seriously, I look over at this cake right now and it hurts my eyes from across the room. 

Anyway, after the piping was finished I put a big pink bow on, that way if it overlapped the outline I would know where to pass up on black. 

Next I put in the outline, the whiskers, and the eyes.  I overlapped the whiskers on the piping to give it some more dimension, or at least pseudo-dimension.  Using white icing I put an oval on the cake and CAREFULLY put yellow sprinkles all over it.

I was not going to dye a tiny glob of icing yellow.  Plus, this is for a kid and kids LOVE sprinkles.

Heck...I love sprinkles....

I pushed the sprinkles into the oval and made sure that it was secure.

I used my same piping tip on the flowers on the side of the cake.  I all I did was make tiny rosettes right next to each other and placed a white sixlet in the middle to make them look like fluffy flowers.  I put little stars between them just to add some more fun.

The cake is on a board covered with gold foil which works remarkably well with the overall look of the cake.  It is fun, it was simple, and it is going to make some little girl very very happy.

The last finishing step was to put some edible sugar glitter within the Hello Kitty character. 

If you have a cake you want to do, consider breaking it down into its simplest components.  You would be amazed at what you can do!

Happy crafting! Pin It Now!